
1- Company Information Settings
Welcome to the Company Information Settings! Customize your company details for a personalized Intellivent experience.
Step 1: Access Company Information
- Click on the “Settings and Configurations” link at the bottom of the side menu.
- You will be automatically redirected to the “Company Information” page. If not, click on the “Company Information” tab.
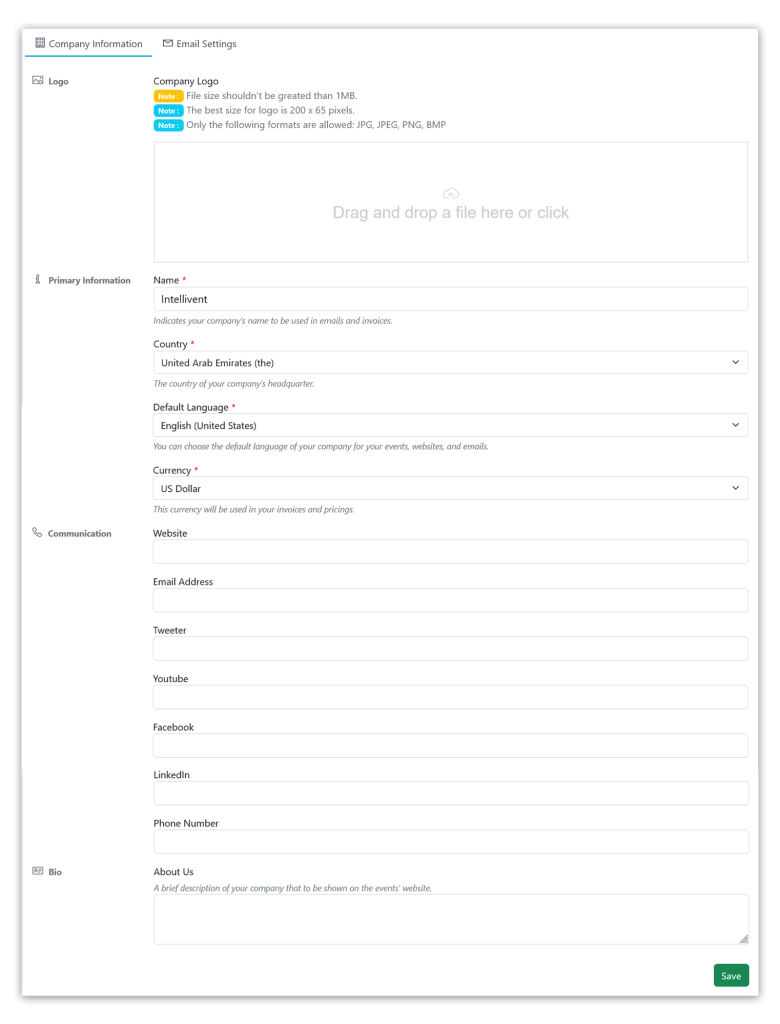
Step 2: Update Company Details
Logo
- Company Logo:
- Change the default logo with your company’s logo. It will be used in invoices and other sections.
Primary Information
- Name:
- Enter the name of your company as declared during registration. This will be used in emails and invoices.
- Country:
- Select the origin country of your company’s headquarters.
- Default Language:
- Choose the default language for your company’s events, websites, and emails.
- Currency:
- Select the currency to be used in your company’s invoices and prices.
Communication
- Website:
- Enter the website of your company.
- Email Address:
- Provide the official and public email address of your company (other than the current user’s email address).
- Twitter:
- Share the official and public Twitter account of your company.
- YouTube:
- Provide the official and public YouTube page of your company.
- Facebook:
- Share the official and public Facebook account of your company.
- LinkedIn:
- Share the official and public LinkedIn page of your company.
- Phone Number:
- Enter the official and public landline or mobile number of your company.
- Communication Information on Event Websites:
- Note: Your provided communication information will be shown on the websites of the events (if they haven’t been generated by Intellivent).
Bio
- About Us:
- Write a brief description of your company. This will be displayed on the events’ website.
Step 3: Save Changes
- After updating the information, click on the “Save” button at the bottom of the page.
Step 4: Success!
- Your company information is now updated!
- If you have any questions or need assistance, feel free to reach out to our support team at support@intelliventapp.com.
That’s it! Your company details are now tailored to enhance your Intellivent experience. If you need further assistance, we’re here to help!
2- Email Settings
Customize your company’s transactional email design with the Email Settings page. Update the properties below to send transactional emails to your clients with the provided formats, colors, and designs.
Step 1: Access Email Settings
- Click on the “Settings and Configurations” link at the bottom of the side menu.
- Navigate to the “Email Settings” tab.
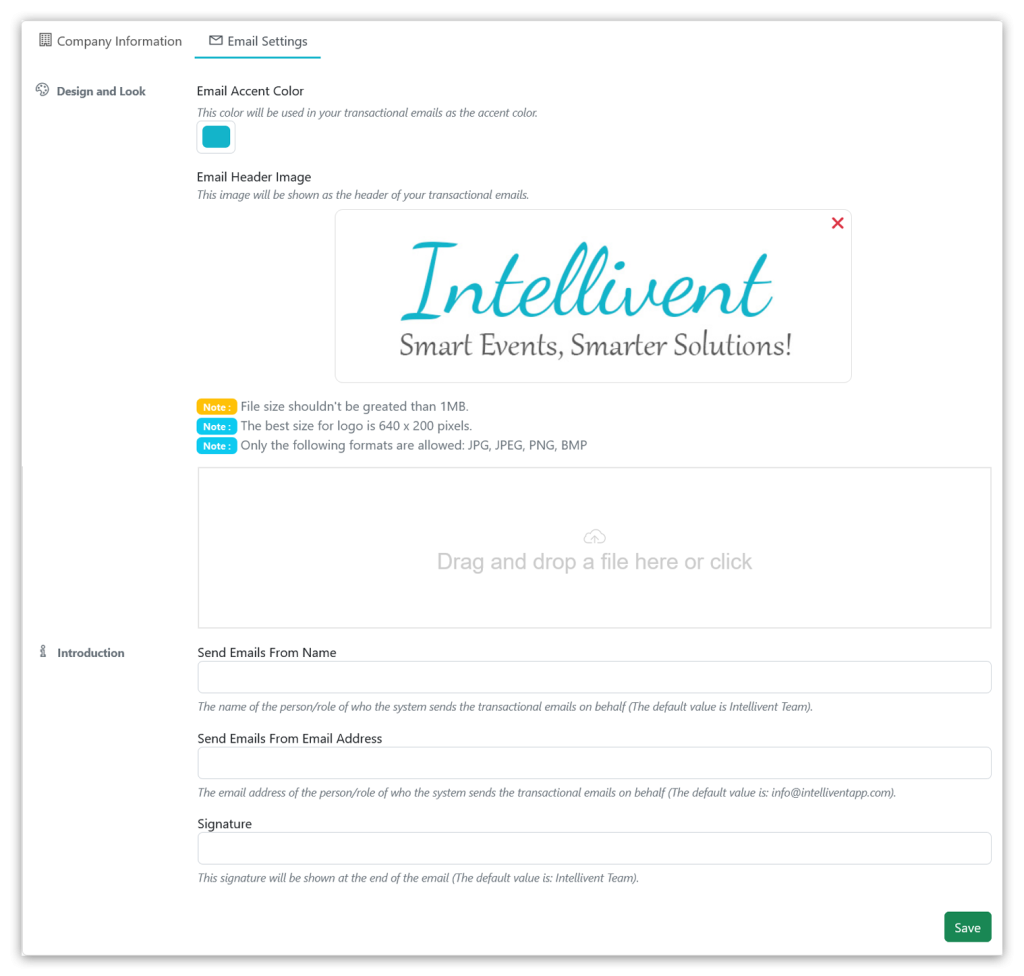
Step 2: Design and Look
Email Accent Color
- Choose the color that will be used as the accent color in transactional emails.
Email Header Image
- Upload an image for the header of transactional emails.
- Maximum Size: 1MB
- Recommended Dimensions: 640 pixels (width) x 200 pixels (height)
- Supported Formats: JPG, JPEG, PNG, BMP
- Remove the uploaded banner by clicking on the red cross icon.
- Replace the existing banner by selecting a new file and saving the information.
Step 3: Introduction
Send Emails From Name
- Specify the name of the person/role sending transactional emails on behalf (Default: Intellivent Team).
Send Emails From Email Address
- Provide the email address of the person/role sending transactional emails on behalf (Default: info@intelliventapp.com). This email is used for enterprise subscriptions only.
Signature
- Enter the signature that will be displayed at the end of the email (Default: Intellivent Team).
Step 4: Save Changes
- After updating the information, click on the “Save” button at the bottom of the page.
Step 5: Success!
- Your email settings are now updated!
- If you have any questions or need assistance, feel free to reach out to our support team at support@intelliventapp.com.
That’s it! Your transactional emails will now reflect the customized formats, colors, and designs. If you need further assistance, we’re here to help!